You've probably seen them on Instagram or at a house party—those tiny, slightly wonky stars or delicate botanical lines that look like they were etched by a friend rather than a machine. They're stick n pokes. Some people call them DIY tattoos or hand-poked art. Whatever the label, finding the right stick n poke ideas is usually where the obsession starts. But here’s the thing: most people jump into this with a "how hard can it be?" attitude and end up with a blurry blob or, worse, an infection.
It’s about intention.
Hand-poking is a slow, meditative process. Unlike a machine that pulses at thousands of RPMs, a hand-poked needle enters the skin one single dot at a time. This allows for a level of detail and a specific "pointillism" aesthetic that machines struggle to replicate perfectly. If you're looking for inspiration, you have to think about how ink behaves when it isn't being forced in by a motor.
Why Minimalism Works Best for Hand-Poked Designs
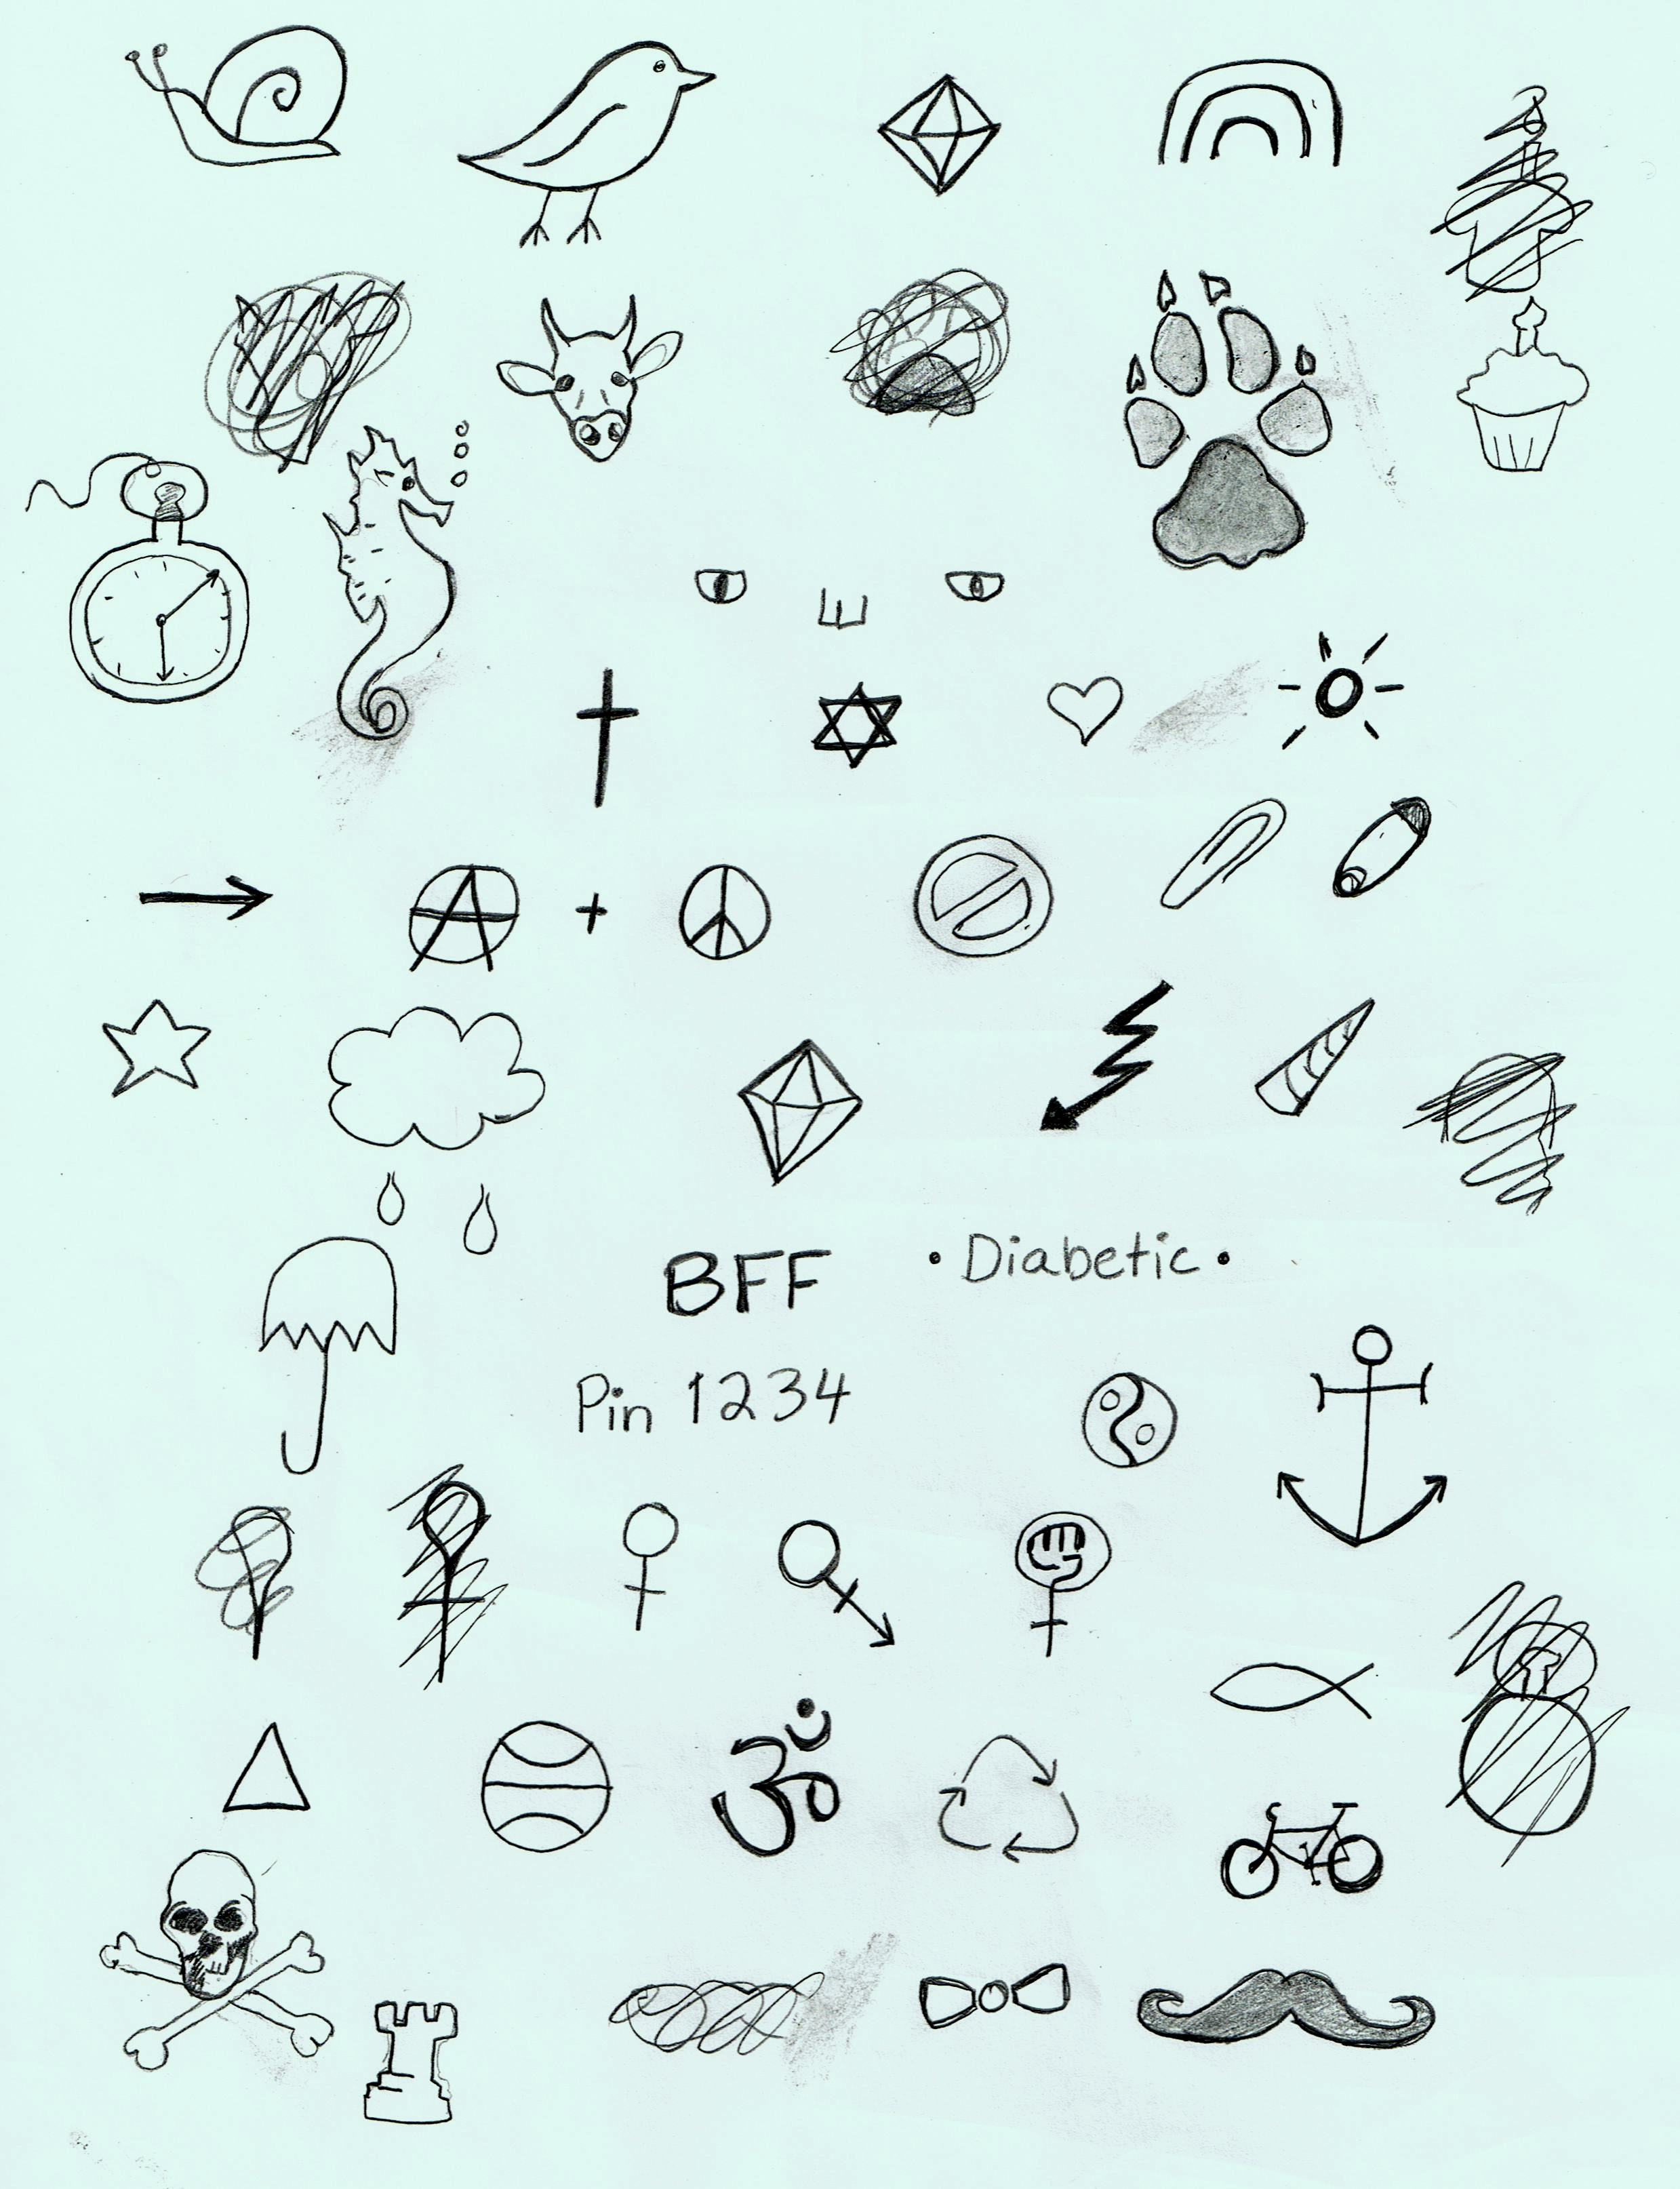
When you’re scouring the internet for stick n poke ideas, you’ll notice a trend toward the tiny. There’s a technical reason for this. Because you are manually depositing ink, large areas of solid black (blackwork) are incredibly tedious and difficult to saturate evenly.
Small, geometric shapes are the bread and butter of this subculture. Think about a single needle (often a 3RL or 5RL in professional terms). A tiny triangle on the inner wrist or a series of three dots—often called the "thieves' dots" or "mi vida loca" in different cultures, though usually just decorative now—works because the margin for error is manageable.
The Beauty of Botanical Lines
Flowers aren't just for professional studios. Simple lavender sprigs, tiny ferns, or a minimalist rosebud are incredibly popular. Why? Because nature isn't perfect. If a line is slightly shaky on a leaf, it just looks like a vein. It’s forgiving. Contrast that with a perfect circle or a long, straight line, which are notoriously the hardest things to tattoo by hand. If you’re a beginner, maybe skip the perfect geometric compass and go for a wildflower.
Placement and the "Fading" Myth
Where you put it matters as much as what it is. You might want a tiny crescent moon on your finger, but be warned: finger tattoos are the marathon runners of the tattoo world—they work hard and wear out fast. The skin on your hands and feet sheds faster than almost anywhere else on your body.
A stick n poke on the side of a finger will likely look like a grey smudge within six months.
If you want longevity, look at the "meaty" parts of the body. The forearm, the calf, or the thigh. These areas hold ink better because the skin is stable and doesn't see as much friction or sun exposure. A lot of people choose the ankle for their first stick n poke ideas because it’s easy to reach if you’re doing it yourself, but reaching around your own leg can lead to some awkward stretching. If you can't stretch the skin taut, the ink won't take. Period.
Safety Isn't a Suggestion
Let's get real for a second. The "stick" part of the name often makes people think of sewing needles and India ink. Don't do that. Seriously.
Sewing needles aren't hollow; they don't hold ink well, and they tear the skin rather than piercing it. Professional tattoo needles are tapered and polished to minimize trauma. As for ink, India ink isn't regulated for internal use and can contain heavy metals or soot that triggers nasty allergic reactions.
If you’re pursuing these stick n poke ideas, buy a sterile kit. Brands like Single Needle or Stick and Poke Tattoo Kit (real companies, by the way) provide medical-grade supplies. You need 70% isopropyl alcohol, green soap, sterile needles, and real tattoo ink like Dynamic or Mom’s.
The "Ink Migration" Reality
Ever seen a tattoo that looks like it’s "leaking" under the skin? That’s blowout. It happens when you poke too deep, hitting the subcutaneous fat layer. Hand-poking requires a very specific depth—usually about 1/16th of an inch. You should feel a slight "pop" as the needle exits the skin. If you’re seeing a blue halo around your lines, you’ve gone too deep. If the ink washes away when you wipe it, you haven't gone deep enough.
Abstract and Script: The Highs and Lows
Abstract "ignorant style" tattoos—a movement popularized by artists like Fuzi UVTPK—embrace the DIY aesthetic. Scrawly handwriting, "ugly-cool" doodles, and intentionally shaky characters are actually quite difficult to pull off well. It requires a confident hand to make something look intentionally messy rather than just poorly executed.
Script is a trap.
Writing words with a needle is like writing with a pen that only works if you tap it a thousand times. Kerning (the space between letters) is a nightmare. If the letters are too close, they’ll bleed together over five years and become unreadable. If you must do text, go big or go for a very simple sans-serif style.
Symbolism and Personal Meaning
Many people use hand-poking for ritualistic reasons. Zodiac signs, constellations, or runes are common stick n poke ideas because they are inherently linear.
- Constellations: Great for covering a larger area without needing a lot of "fill."
- Runes or Sigils: Bold, straight lines that are easier to track.
- Celestial bodies: Moons, suns, and planets allow for varying dot densities to create shading (stippling).
Aftercare Is Where Most People Fail
You finished the poke. It looks great. You’re done, right? No.
A hand-poked tattoo is an open wound. Treat it like one. You should keep it covered with a breathable bandage for the first few hours, then wash it gently with unscented soap. Avoid swimming for at least two weeks. No lakes, no pools, no hot tubs. Bacteria loves fresh tattoos.
Don't over-moisturize. A tiny bit of Aquaphor or an unscented lotion like Lubriderm is fine, but if you drown the tattoo in ointment, the skin can't breathe, and you might actually pull the ink out as it scabs.
Navigating the Stigma
There’s a weird tension between the "scratchers" (unlicensed DIY-ers) and the professional hand-poke artists like Grace Neutral or Tati Compton. The latter have elevated this to a high art form, charging hundreds of dollars for intricate, large-scale pieces.
If you're doing this at home, acknowledge the limitations. You aren't going to get a photorealistic portrait of your dog with a single needle in your bedroom. Stick to the roots of the craft: symbols, lines, and memories.
Actionable Steps for Your First Design
Before you even touch a needle, draw your idea. Then draw it again. Then draw it on your skin with a surgical skin marker (or a sterile Sharpie if you must).
- Simplify the design: If your idea has more than five intersecting lines, simplify it.
- Size matters: Anything smaller than a nickel will likely blur into a dot over a decade. Aim for at least 1-2 inches for any design with "negative space."
- Check your light: You cannot tattoo what you cannot see. Use a headlamp or a bright desk lamp. Shadows are the enemy of clean lines.
- Practice on fruit: Buy a grapefruit or an orange. The skin texture is surprisingly similar to human skin. It will teach you how much pressure is needed to leave a mark without obliterating the surface.
- Sanitation station: Set up on a non-porous surface (like a metal tray or plastic-wrapped table). Use gloves. Always.
The best stick n poke ideas are the ones that respect the medium. It's a slow art. If you're in a rush, go to a shop and get a machine tattoo. If you want a story etched into your skin one dot at a time, take your time and do it right.
Next Steps for Success
Gather your materials from a reputable medical supplier rather than a craft store. Once you have a sterile kit, spend a full week sketching your chosen design on paper to build muscle memory for the shapes. Before tattooing yourself, perform a "spot test" with the ink on a small patch of skin to ensure you don't have an allergic reaction to the pigment or the carrier solution.